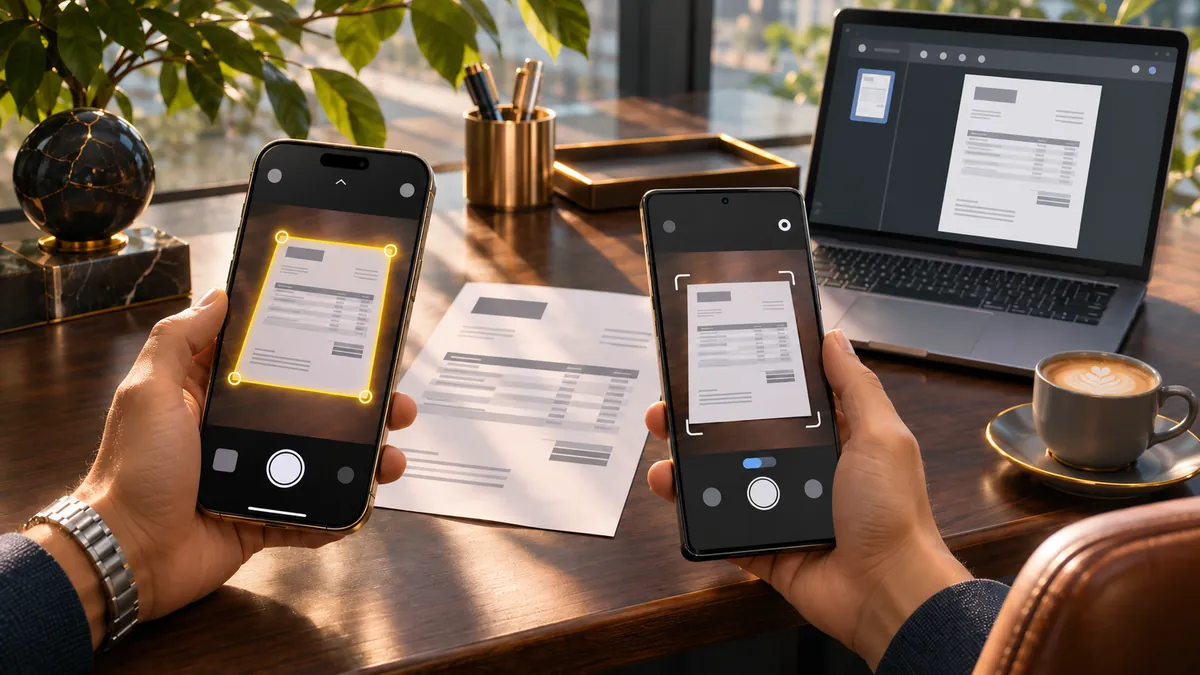
You can scan documents with your phone without purchasing a scanner or installing a dedicated scanning application. iPhones have document-scanning tools built into Notes and Files, while Android users can use Google Drive, Files by Google or supported Samsung Galaxy camera features to capture pages, combine multiple scans and create PDF files.
How to scan documents on an iPhone without downloading an app
Apple includes a document scanner in two of its standard applications: Notes and Files. Both can automatically detect the edges of a paper document, correct its perspective and capture a digital version. This makes an iPhone particularly convenient when you need to scan a receipt, contract, application form or handwritten note quickly.
Method 1: Scan documents using Apple Notes
The Notes application is useful when you want to capture documents and keep them alongside your other notes. You do not need to download another application or create an account with a separate scanning service.
Follow these steps:
- Open the Notes application on your iPhone.
- Create a new note or open an existing one.
- Tap the Attachment button and select Scan Documents.
- Position your document within the camera view.
- Allow the camera to detect and automatically capture the page, or use the shutter button or a volume button to take the picture manually.
- Adjust the corners if the application has not identified the document boundaries correctly.
- Tap Keep Scan and repeat the process if you have additional pages.
- Tap Done to finish scanning.
Apple also provides additional scanning controls in iOS 26, including flash and image-filter options. These can help when you are capturing documents in poorly lit environments or want to improve their appearance before saving them.
Your scanned pages remain attached to the note. You can open the document, use Markup and add an existing signature or create a new one. This is particularly useful when you receive a form that needs to be signed before it is shared with someone else.
Method 2: Scan documents directly into Apple Files
If you prefer organising documents into folders rather than keeping them inside individual notes, the Files application offers a more convenient approach. Its built-in scanner allows you to capture a document and choose where the finished scan should be saved.
Here is how it works:
- Open the Files application.
- Navigate to the folder where you want to save your document.
- Tap the More button.
- Select Scan Documents.
- Position the document in front of your camera.
- Allow automatic capture or use the manual shutter controls.
- Adjust the page boundaries and tap Keep Scan.
- Add more pages if necessary and select Done.
- Choose the destination folder and tap Save.
This method is particularly useful for people who regularly handle invoices, employment documents, travel receipts and other paperwork. Saving scans directly into organised folders also makes them easier to locate later.
How to scan documents on Android phones
Android offers several ways to digitise paperwork. Google Drive and Files by Google are two particularly useful options because their scanning tools support document-edge detection, image adjustments and multiple-page capture. Samsung Galaxy devices also offer document scanning through supported versions of the Camera application.
Method 1: Scan documents using Google Drive
Google Drive is a convenient option if you want to create PDFs that can be searched later. Its scanning functionality is available through the mobile application on both Android and iPhone, making it useful when you work across different smartphone platforms.
To scan a document on Android:
- Open the Google Drive application.
- Tap the camera icon in the bottom-right corner.
- Position your document in front of the camera.
- Wait for the blue outline to identify the document boundaries.
- Choose automatic or manual capture.
- Review the image and adjust the crop if necessary.
- Apply a filter or use the cleaning tool to remove unwanted marks.
- Tap Add if you want to scan another page.
- When all pages are ready, tap Done.
- Give the document a filename, choose PDF or JPG where available, select a Drive folder and tap Save.
One useful feature is automatic document-boundary detection. Instead of manually cropping every photograph, Google Drive identifies the paper’s edges and provides a blue outline showing the area that will be included in the scan.
The application also provides editing options to rotate pages, adjust colours, convert images to grayscale, remove unwanted objects, retake photographs and delete individual pages. Its document-scanning feature can create searchable PDFs, which is particularly useful when you need to find specific information inside a large collection of scanned paperwork.
Method 2: Use Files by Google to create searchable PDFs
Files by Google offers another straightforward scanning option for Android users. It is particularly useful if you want scanned documents saved directly on your phone rather than relying exclusively on cloud storage.
Follow these instructions:
- Open Files by Google on your Android smartphone.
- Tap Scan in the bottom-right corner.
- Point your camera towards the document.
- Allow automatic capture or switch to manual mode.
- Review the captured page and adjust its boundaries.
- Use the available filters to improve readability or convert the image to grayscale.
- Tap Add to include additional pages.
- Retake or delete individual pages if required.
- Tap Done when the document is complete.
Files by Google automatically saves scanned documents as searchable PDF files. You can find them under Recents on the application’s homepage or navigate to Documents and then Scanned.
The scans are also stored in a dedicated Scanned folder inside the Downloads directory. If you cannot locate a particular document, you can search for PDF files directly within the application.
Method 3: Scan documents using a Samsung Galaxy camera
Some Samsung Galaxy smartphones can detect and scan documents directly through the Camera application. This means users with supported devices may not need to open Google Drive or install another scanning application.
To use the feature:
- Open the Camera application.
- Tap Settings and locate the intelligent features or scanning options.
- Enable Scan documents and text if the option is available.
- Return to the camera and position the document within the viewfinder.
- Wait for the document-detection indicator to appear.
- Tap the scan button to capture the document.
- Review the captured image and adjust its boundaries if necessary.
- Save the finished scan.
Supported Galaxy models can also offer automatic scanning, which captures a document without requiring you to press the shutter button. Samsung provides an option to remove unwanted objects, such as fingers that accidentally appear in the photograph.
However, feature availability and the exact settings can vary between Galaxy models and software versions. If your Camera application does not display a document-scanning option, Google Drive or Files by Google provides an alternative.
How to scan multiple pages into one PDF
Scanning several pages separately and sending them as individual photographs can make paperwork difficult to manage. A better approach is to capture all the pages within one scanning session and save them together as a single PDF document.
Apple Notes, Apple Files, Google Drive and Files by Google support adding additional pages during the scanning process.
For a multi-page document, use this simple workflow:
- Place the first page on a flat, well-lit surface.
- Capture the first page using your phone’s scanning tool.
- Review the crop and correct any misplaced edges.
- Tap Keep Scan or Add to capture the next page, depending on the application.
- Continue until every page has been captured.
- Check the page order and remove any duplicate or incorrectly captured images.
- Finish the scanning session and save the document.
For example, if you are scanning a 10-page employment contract, you can capture all 10 pages in one session and save them as a single PDF. This makes the document easier to email, upload to an application portal or store in a dedicated folder.
How to make a scanned PDF searchable
There is an important difference between a regular scanned PDF and a searchable PDF. A conventional scan may simply contain photographs of individual pages. Although the document looks readable, you might not be able to search for a person’s name, an invoice number or a particular sentence using the PDF search function.
Searchable PDFs use optical character recognition (OCR) to identify text within scanned images. This technology converts recognised characters into searchable information while retaining the visual appearance of the original document.
If searchable documents are important to your work, Google Drive and Files by Google are useful options. Both describe their mobile scanning features as capable of creating searchable PDFs.
After creating a scan, open the saved PDF and test whether you can locate a word or number from the document. This is a simple way to check whether the text is searchable rather than merely visible as an image.
For documents containing handwriting, unusual fonts or poor-quality printing, text recognition may be less accurate. Always review important figures, names and dates before relying on an automatically recognised document.
Tips for getting better document scans with your phone
A smartphone can produce clear digital copies of everyday paperwork, but the quality depends on how the original document is captured. A few adjustments can significantly improve the final result.
- Use a flat surface: Place the document on a table rather than holding it in your hand. This reduces movement and helps the camera capture the entire page.
- Choose good lighting: Use natural or evenly distributed lighting to prevent shadows and reflections.
- Keep the camera parallel: Position your phone directly above the document instead of capturing it from an angle.
- Check the edges: Make sure the scanning application has included every corner of the page, particularly when dealing with contracts and application forms.
- Use grayscale when appropriate: Grayscale or black-and-white filters can make printed documents easier to read and reduce unnecessary colour information.
- Review every page: Check for blurred text, missing sections and incorrect page order before sharing the PDF.
- Organise your files: Use meaningful filenames and dedicated folders so that important documents are easier to find.
Privacy also matters when scanning identification documents, financial statements or contracts. Before saving or sharing a scan, check which account and folder will receive it, review sharing permissions and avoid placing sensitive documents in publicly accessible locations.
Frequently asked questions
Can I scan documents with my phone without downloading an app?
Yes. iPhone users can scan documents through the built-in Notes and Files applications. Some Samsung Galaxy smartphones also support document scanning directly through their Camera application. Other Android users can use Google Drive or Files by Google.
What is the best free document scanner app?
Google Drive and Files by Google are useful options for Android users who want searchable PDF scans. Google Drive also supports document scanning on iPhones. iPhone users who do not want another application can use Apple Notes or Files for basic document scanning.
Can I scan multiple pages into one PDF?
Yes. Apple Notes, Apple Files, Google Drive and Files by Google allow you to add multiple pages during a scanning session. You can capture the pages in sequence and save them together as one document rather than creating separate files.
Where are scanned documents saved on Android?
Files by Google automatically saves scanned PDFs in a dedicated Scanned folder inside the Downloads directory. Google Drive saves scanned documents to the Drive account and folder selected during the saving process.
Can I sign a scanned document using my iPhone?
Yes. Open the scanned document in Notes, select Markup and use the Signature option to create a new signature or insert one you have already saved. You can resize and position the signature before completing the document.
Scanning documents no longer requires a dedicated scanner. iPhone users can use Notes and Files, while Android users have Google Drive, Files by Google and supported Samsung Galaxy camera features. These tools can capture individual pages, combine multiple scans and create PDF documents, with searchable PDF options available through Google’s scanning applications. Which smartphone scanning method do you currently use, and has it replaced your need for a traditional scanner?